Tile InstallationSeattle & 50+ Cities
Professional tile installation for kitchens, bathrooms, and living areas. We work with ceramic, porcelain, marble, travertine, and all natural stone. Our services include floor tile, wall tile, shower tile, backsplash installation, and custom mosaic work.
Serving Seattle, Bellevue, Redmond, Kirkland, Tacoma & 50+ cities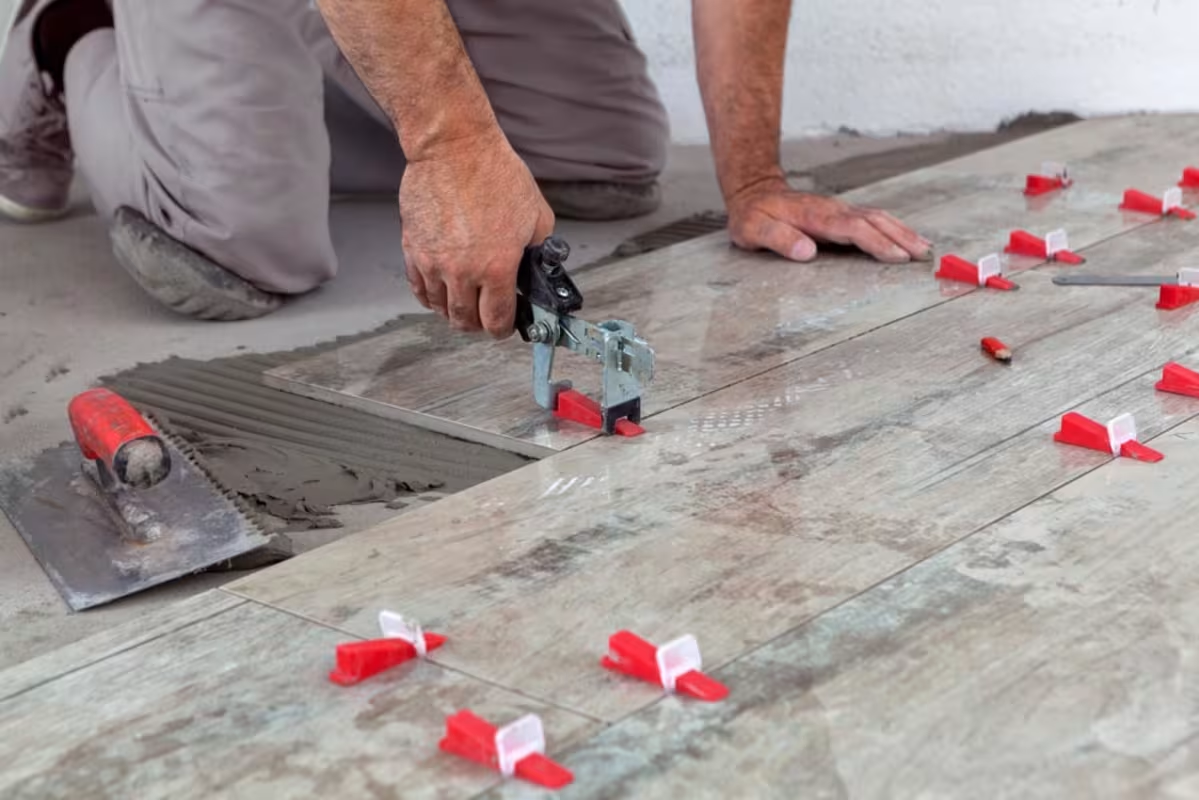
Professional Tile Remodeling Process
From inspection to completion in just one day. Here's how we transform your tile.
Free Consultation & Estimate
We visit your home, discuss your vision, take measurements, and provide a detailed written estimate with material options.
Design & Material Selection
Choose your materials, colors, and finishes. We help you select the best options for your budget and style preferences.
Demolition & Preparation
We carefully remove old fixtures, protect your home, and prepare the space for new installations. Permits handled as needed.
Plumbing & Electrical
Licensed professionals handle all plumbing and electrical work, including any layout changes or upgrades required.
Installation & Finishing
Expert installation of tile, countertops, fixtures, cabinetry, and all finishing details. Quality craftsmanship guaranteed.
Final Walkthrough & Warranty
We do a detailed walkthrough with you, address any concerns, and provide warranty documentation for all work completed.
What's Included in Your Tile Remodel
Every project includes comprehensive service from start to finish — no hidden costs, no surprises
Surface Preparation
- Existing tile or flooring removal
- Subfloor leveling with self-leveling compound
- Cement board or backer board installation
- Waterproof membrane for wet areas
Layout & Installation
- Precise tile layout planning to minimize cuts
- Thin-set mortar application with proper trowel size
- Tile cutting with wet saw for clean edges
- Spacer placement for consistent grout lines
- Level and plumb checking throughout
Grouting & Sealing
- Color-matched grout application
- Grout haze removal and cleaning
- Penetrating sealer for natural stone
- Silicone caulk at all corners and transitions
Special Applications
- Shower niche construction and tiling
- Decorative borders and accent patterns
- Mosaic and penny tile installation
- Stair treads and bullnose edges
- Heated floor mat installation under tile
Tile Material & Pricing Guide
Compare materials side by side — we help you choose the right balance of beauty, durability, and budget
Porcelain Tile
$3–$12/sq ftCeramic Tile
$1–$7/sq ftNatural Stone
$8–$30/sq ftGlass Tile
$7–$25/sq ftWhat to Expect: Tile Remodel Timeline
A clear week-by-week breakdown so you know exactly what's happening at every stage
Demolition of existing surface, subfloor inspection and repair, backer board installation
Tile layout, thin-set application, tile installation (200-300 sq ft per day for floor, less for walls)
Grouting, caulking, sealing, and cleanup. Floors need 24-48 hours before walking on them.
What Affects Your Tile Remodel Cost
No hidden fees — here's exactly what drives pricing so you can make informed decisions
Tile Material
High ImpactThe tile itself ranges from $1/sq ft (basic ceramic) to $30+/sq ft (premium natural stone). For a 100 sq ft bathroom floor, that's $100 vs. $3,000+ in materials alone.
Pattern Complexity
Medium ImpactStraight lay is fastest and cheapest. Herringbone, chevron, and basket weave patterns add 20-40% to labor costs due to extra cuts and layout time.
Substrate Condition
Medium-High ImpactIf the existing subfloor is uneven or damaged, leveling and backer board installation adds $3-$6/sq ft. This step is critical — tile laid on an uneven surface will crack.
Wet Area Waterproofing
Medium ImpactShower installations require waterproof membrane ($3-$5/sq ft). Floor drains need special treatment. Skipping this step leads to expensive water damage down the line.
Expert Tip from Our Tile Specialists
The most important factor in a long-lasting tile installation isn't the tile — it's what's underneath. A properly prepared substrate (level, clean, with the right backer board and waterproofing) determines whether your tile lasts 5 years or 50 years. We spend 30-40% of our time on prep because cutting corners here means failures later. If a contractor rushes past substrate prep, that's a red flag.
Common Tile Remodeling Mistakes
Using wall tile on floors
Wall tiles often have a smooth, glazed surface with low friction ratings. Floor tiles need a minimum COF (coefficient of friction) of 0.42 for dry areas and 0.60 for wet areas. We always verify slip ratings before installation.
Not ordering enough tile
We recommend ordering 10-15% extra for straight layouts and 15-20% for diagonal or complex patterns. Tile from different production lots can vary in shade. Extra tiles are also essential for future repairs.
Forgetting expansion gaps
Tile expands and contracts with temperature changes. Without a 1/8" gap at walls and transitions (covered by caulk or trim), tile can buckle or crack. This is especially important for heated floors.
Before & After Transformations
See the difference professional remodeling makes in real Seattle homes
Bathroom Tile Installation


Kitchen Backsplash & Floor Tile


Recent Tile Projects


What Our Customers Say
"Complete bathroom remodel done in under 2 weeks. New tile, vanity, shower — everything looks incredible. The team was professional and kept us informed throughout. Highly recommend for any remodeling project!"
"They transformed our dated kitchen into a modern showpiece. New countertops, backsplash, and cabinet refresh. The attention to detail was outstanding and the price was very competitive."
"Had them install a walk-in shower to replace our old tub. The tile work is flawless and the glass enclosure looks amazing. Best home investment we've made!"
"New quartz countertops in our kitchen look absolutely stunning. Precise cuts, perfect seams, and they cleaned up everything after. Will definitely use them for our bathroom remodel next."
"Tile installation in both bathrooms — floor and shower walls. Incredible craftsmanship, perfectly level, grout lines are immaculate. These guys know what they're doing."
The Remodeling Pros Difference
Licensed contractors delivering premium remodeling with quality materials
Full-Service Remodeling
From design to final walkthrough — we handle demolition, plumbing, electrical, tile, and fixtures
Licensed & Insured
WA State licensed general contractor. Fully insured with 5 Years warranty on all work.
15+ Years Experience
Hundreds of completed remodels across the Puget Sound. We know Seattle homes inside and out.
Transparent Pricing
Detailed estimates upfront. No hidden fees or surprise charges. We respect your budget.
Tile Remodeling — Frequently Asked Questions
QWhat size tile is best for a small bathroom?
Larger tiles (12×24 or 24×24) actually make small bathrooms feel bigger — fewer grout lines create a cleaner, more expansive look. We recommend light-colored large-format tiles on both floor and walls for maximum visual space.
QHow do you handle tile around drains and fixtures?
We make precise cuts using a wet saw and angle grinder. For floor drains, we pre-slope the substrate at 1/4 inch per foot toward the drain, then cut tiles to follow the drain profile. Every cut edge is smoothed to prevent sharp edges.
QCan I tile over existing tile?
Sometimes, if the existing tile is well-bonded, level, and in a non-wet area. However, it adds height (which affects door clearances and transitions) and doubles the weight. For showers and floors, we recommend removing old tile for the best long-term result.
QWhat grout color should I choose?
For low maintenance, match your grout to the tile color — stains are less visible. Contrasting grout (white grout with dark tile) is dramatic but shows dirt faster. We always recommend epoxy grout in showers — it's stain-proof and doesn't need sealing.
QHow long after tile installation can I use the shower?
Thin-set mortar needs 24 hours to cure before grouting. After grouting, wait another 24-48 hours before exposing to water. If we apply a penetrating sealer, add one more day. Total: 3-4 days from tile to first shower.
Get Your Free Tile Remodeling Quote
Serving Seattle, Bellevue, Redmond, Kirkland, Tacoma and 50+ cities across the Puget Sound
Schedule through our contact page or call now. We respond instantly with the next step, scope questions, and estimate timing.
Related Tile Remodeling Case Studies
Real before-and-after projects help you compare scope, materials, budget drivers, and finish quality before requesting an estimate.
BeforeAfterCapitol Hill, Seattle
Capitol Hill Kitchen Remodel With Quartz Island
Seattle kitchen remodel converting a dated 1960s galley layout into an open-concept kitchen with quartz countertops, custom shaker cabinets, updated lighting, and a practical island with seating.
 Before
 After
AfterBellevue, WA
Bellevue Primary Bathroom Remodel With Walk-In Shower
Bellevue bathroom remodel replacing a dated 1990s layout with a frameless glass walk-in shower, floating double vanity, heated porcelain tile floors, and cleaner daily function.
 Before
 After
AfterKirkland, WA
Kirkland Craftsman Kitchen Remodel
Kirkland kitchen remodel in a Craftsman-style home, preserving architectural character while adding modern cabinetry, upgraded electrical, durable counters, and better storage.

Tile Installation — Available Across Greater Seattle
Other Services We Offer
Complete remodeling and renovation solutions

Bathroom Remodeling
Complete bathroom transformations — from design to installation. New tile, vanity, shower, fixtures, and more. Turn your outdated bathroom into a modern retreat.

Kitchen Remodeling
Transform your kitchen with new cabinets, countertops, tile, fixtures, and layout updates. From minor refreshes to complete gut renovations.

Countertop Installation
Professional countertop installation — granite, quartz, marble, and solid surface. Precision measurement, fabrication, and seamless installation.